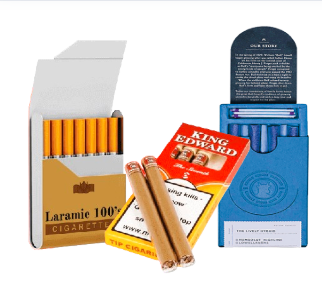
A paper cigarette box is a simple yet useful item that can be customized for personal use, gifts, or product packaging. Whether you need a quick storage solution or want to create a unique and eco-friendly alternative to traditional packaging, making a box is a fun and creative project. With the right materials and precise measurements, you can art a sturdy package that securely holds products or other small items. Therefore, this guide will walk you through the step-by-step process of making a Custom Cigarette Boxes from scratch.
Materials Needed To Make Paper Cigarette Box
Before starting, gather the following materials for Paper Cigarette Box:
- Thick paper or cardstock (for durability)
- Ruler (for accurate measurements)
- Pencil (for marking measurements)
- Scissors or knife (for cutting)
- Glue or double-sided tape (for assembling the box)
- Cutting mat (optional, for a smooth and precise cut)
Using thicker paper will make the package more durable and prevent it from losing shape over time.
Drawing and Measuring the Template
Start by drawing the box template on the paper. A standard Paper Cigarette Box consists of the following parts:
Front and Back Panels – Therefore, these will form the main body of the pack.
Side Panels – Slightly narrower than the front and back panels.
Top Flap – This acts as a lid that folds over to close the box.
Bottom Flap – Helps secure the bottom of the pack.
Use the ruler and pencil to mark the measurements accurately. Additionally, a regular cigarette pack size can be:
Front and back panels: 8 cm height × 5.5 cm width
Side panels: 8 cm height × 2 cm width
Top flap: 2 cm height × 5.5 cm width
Bottom flap: 2 cm height × 5.5 cm width
Moreover, make sure to leave extra flaps (approximately 1 cm) on the edges of the side panels for gluing.
“Packing is the silent storyteller of your item, conveying quality and care before the first touch.”
Cutting the Template For Paper Cigarette Box
Once the template is drawn:
- Cut along the outer lines using scissors or a knife.
- Score the folding lines by gently running the blade along them (without cutting through).
- Further, fold along the scored lines to shape the box.
Precise cuts and folds will help the pack assemble neatly.
Assembling the Paper Cigarette Box
Now that the template is cut and folded, follow these steps to assemble it:
- Apply glue or double-sided tape on the flaps of the side panels.
- Then, attach the side panels to the front and back panels, pressing firmly to secure.
- Fold and glue the bottom flap to create a solid base.
- Attach the top flap, ensuring it remains flexible for easy opening and closing.
- Let the glue dry completely before handling the box.
Personalizing the Box
To make the Paper Cigarette Box more unique, consider these customization ideas:
Decorate with printed designs or hand-drawn artwork.
Use patterned or colored paper for a stylish look.
Additionally, add a small tab or magnetic closure for a professional finish.
Label the box with text or images to suit personal or business needs.
If making multiple boxes for packaging, consider using a template stencil to ensure uniformity.
Increasing Durability Of Paper Cigarette Box
Now, to make the box last longer:
Laminate the paper to protect against moisture.
Reinforce edges with an additional layer of paper.
Use high-quality adhesive for a strong bond.
A well-made paper cigarette box can be both practical and visually appealing.
Conclusion
Making a paper cigarette box is a simple yet effective way to store products or other small items. With the right measurements, clean cuts, and strong adhesive, you can create a sturdy and stylish pack. If for personal use, branding, or gifting, a handmade paper cigarette packaging adds a unique touch. Moreover, in the competitive market of Product Packaging UK, well-designed packaging can help your brand stand out and attract customers effortlessly. By following these steps, you can design and assemble a box that meets your specific needs while being cost-effective and eco-friendly.